
データベースの作成
Twitter用のデータベースを作成します。
下図のように、「twitter」という名前のデータベースを作成し、その中に「ユーザー(users)」「フォロー(follows)」「通知(notifications)」「ツイート(tweets)」「いいね(likes)」の各テーブルを作成します。
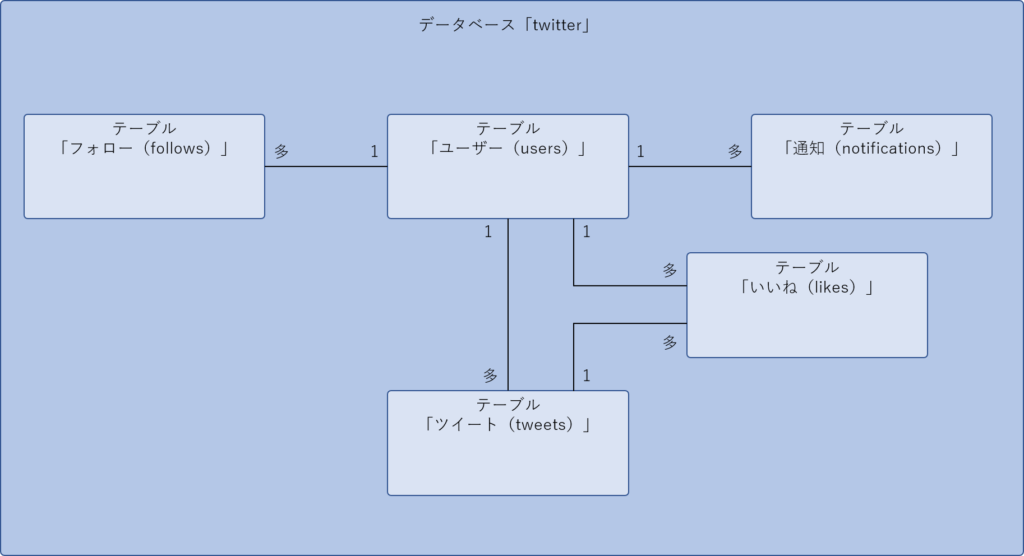
テーブル間の線および「1」「多」は、テーブル間の関係になります。
例えば、ユーザー1人に対して、複数のツイートを投稿できますよね。そのためユーザー(users)側が「1」、ツイート(tweets)側が「多」という関係になります。
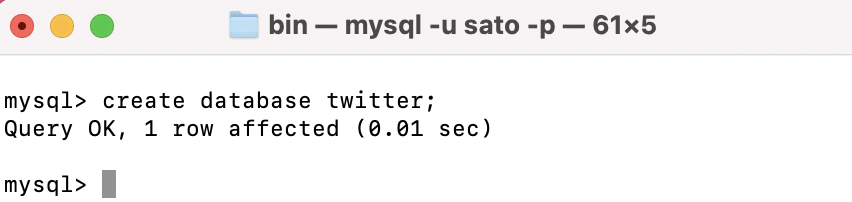
ターミナルで以下を実行します。
create database twitter;
作成したデータベース「twitter」の中で作業するようにします。
ターミナルで以下を実行します。
use twitter;

テーブルの作成
データベース「Twitter」内にテーブルを作成します。
ユーザー(users)
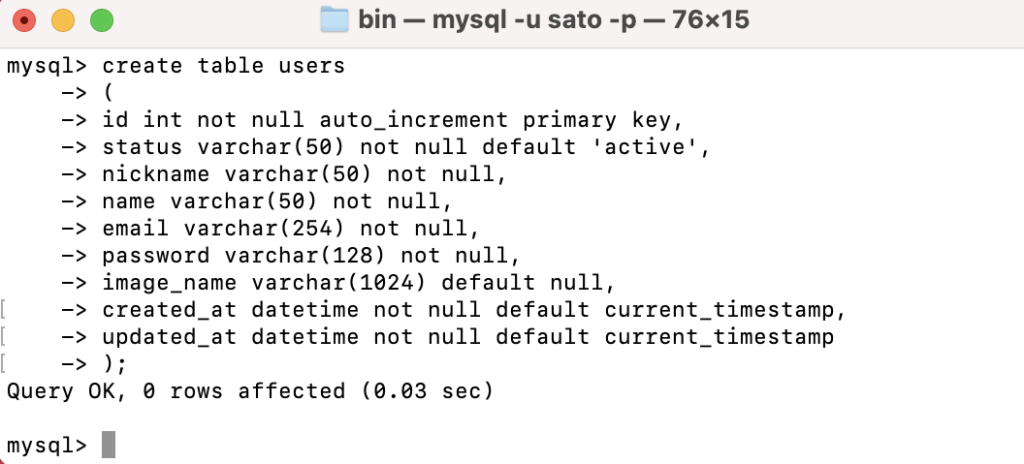
ターミナルで以下のSQLを実行します。
create table users
(
id int not null auto_increment primary key,
status varchar(50) not null default ‘active’,
nickname varchar(50) not null,
name varchar(50) not null,
email varchar(254) not null,
password varchar(128) not null,
image_name varchar(1024) default null,
created_at datetime not null default current_timestamp,
updated_at datetime not null default current_timestamp
);
「current_timestamp」は文字通り「現在日時」という意味です。これを指定すると、データを追加するとき、MySQLが自動的に現在日時を登録してくれます。
ツイート(tweets)
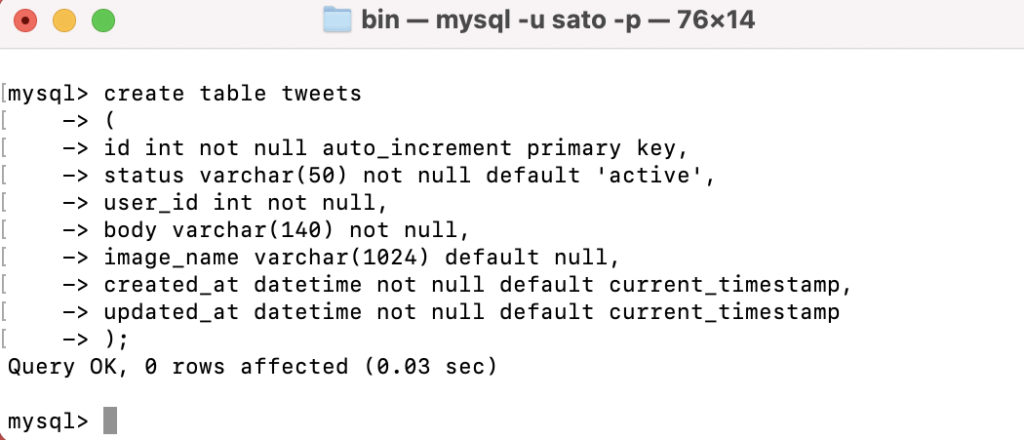
ターミナルで以下のSQLを実行します。
create table tweets
(
id int not null auto_increment primary key,
status varchar(50) not null default ‘active’,
user_id int not null,
body varchar(140) not null,
image_name varchar(1024) default null,
created_at datetime not null default current_timestamp,
updated_at datetime not null default current_timestamp
);
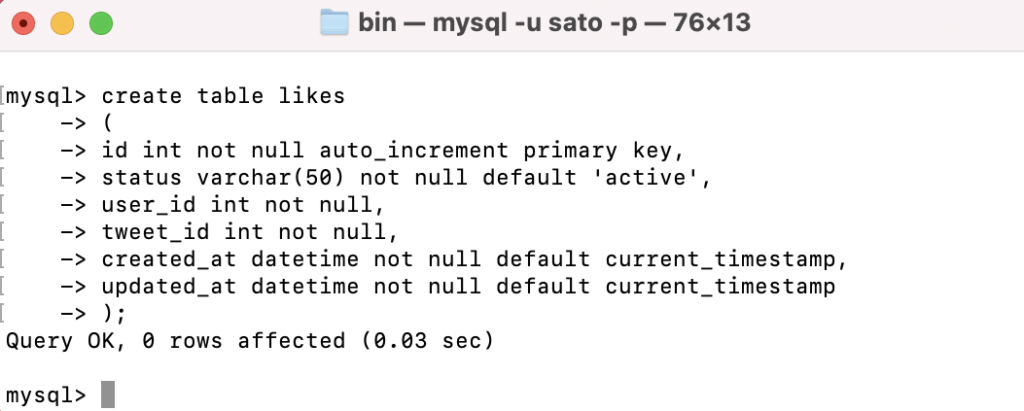
いいね(likes)
ターミナルで以下のSQLを実行します。
create table likes
(
id int not null auto_increment primary key,
status varchar(50) not null default ‘active’,
user_id int not null,
tweet_id int not null,
created_at datetime not null default current_timestamp,
updated_at datetime not null default current_timestamp
);
フォロー(follows)
ターミナルで以下のSQLを実行します。
create table follows
(
id int not null auto_increment primary key,
status varchar(50) not null default ‘active’,
follow_user_id int not null,
followed_user_id int not null,
created_at datetime not null default current_timestamp,
updated_at datetime not null default current_timestamp
);

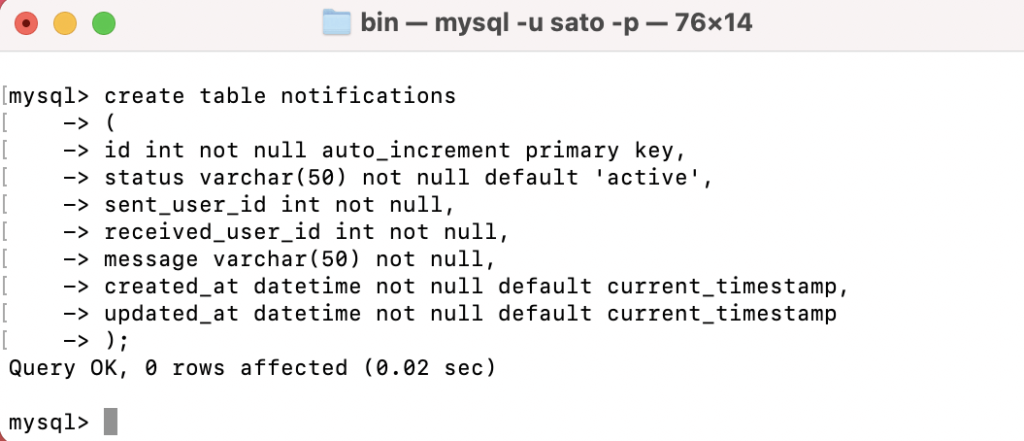
通知(notifications)
ターミナルで以下のSQLを実行します。
create table notifications
(
id int not null auto_increment primary key,
status varchar(50) not null default ‘active’,
sent_user_id int not null,
received_user_id int not null,
message varchar(50) not null,
created_at datetime not null default current_timestamp,
updated_at datetime not null default current_timestamp
);
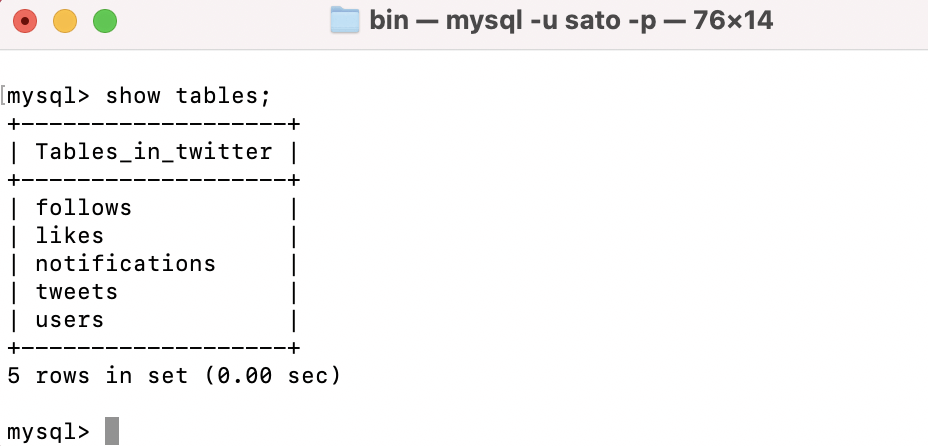
ここまでできたら、ターミナルで以下を実行し、正常に各テーブルが作成されていることを確認します。
show tables;
本節の説明は以上になります。